It's not always easy to decide the best time to do things, but having always wanted a greenhouse, and with the shed in the garden falling down, I decided it was time to replace the shed with a greenhouse. I have never had a suitable garden before the current one to house a greenhouse, and struggled to decide where to put on in this garden. The shed falling down gave me the perfect opportunity to at last sort out getting a greenhouse, and now with the current advice to #stayathome, a greenhouse to potter in is perfectly timed.
There are many decisions to be made about what size and sort of greenhouse to have, my co father- in- law, Rick, who has three large greenhouses in his garden advised me to get the biggest you can accommodate in your garden which seemed like good advice. I looked online and found The Greenhouse People's website was reasonably easy to follow, and there was someone at the end of the phone to talk through differences between greenhouses which wasn't obvious to a beginner. I chose an 8ft x 10ft aluminium greenhouse, I quite fancied a green one, but they were about £300 more, but I did opt for the Stableford ultimate package which included self opening windows and shelving.
I took a few photos of the process from shed to greenhouse, although something I left out was the photos of the shed being removed from the site. When we had a cleared piece of ground, we measured the area, and Tim then dug out a small trench to fill with concrete where the base was going to be laid with friend Andrew who had kindly volunteered to help with the concreting and leveling of
the base. The first photo shows the shuttering round the trench and string in place where the edge of the greenhouse would stand, this stage of the process was quite difficult because it was hard to make sure the rectangle was 'square', and the rain kept coming filling the trenches with water.
 We visited Sansums depot and bought a large bag of aggregate and several bags of cement from them, the staff are very helpful and can calculate how much you are going to need for any given job. However we hadn't taken accurate measurements of the trench, so on returning home, I rang them with the measurements and bought another half bag of aggregate, seen being delivered over the back fence below. However we now have too much aggregate and could do with this process happening in reverse; Sansums have said they will come and pick it up when they're in the area, and I'm hoping they will be able to do so because I can't work out another way of getting rid of it.
 And below here is the concrete base, finished with the help of Andrew while I went on a previously arranged trip to Bath with friends for the day, hence only one photo of this process, seen below Tim took a photo of the ballast they filled the trench with before adding concrete:
 and here are a couple of photos with the concrete added:
 That was rather a good fine day when the base was laid, but by the next day it was raining again, and we were worried that it wouldn't dry properly.
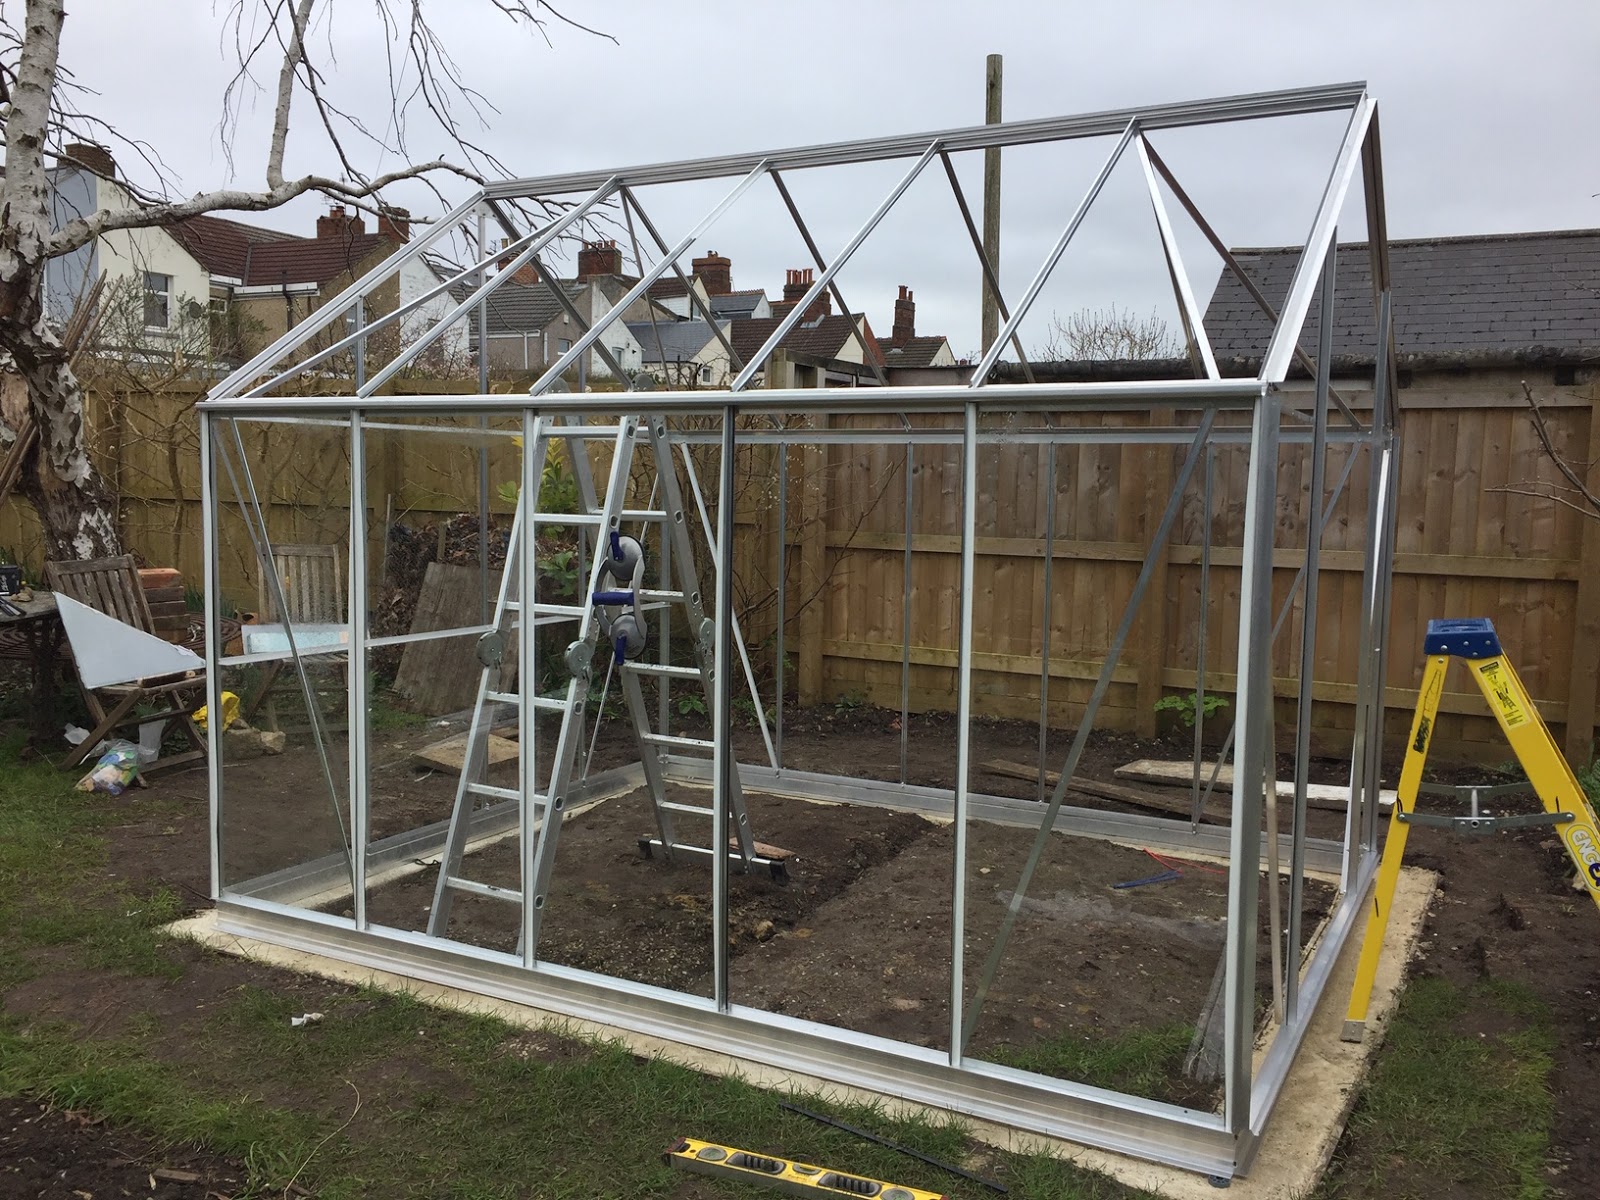
 The greenhouse arrived reasonable quickly after ordering on 28 February. I knew we needed to ask a professional person to assemble the greenhouse, The Greenhouse People had a list of approved greenhouse assemblers, so I rang one in the south west region who said he had been inundated with requests, but hoped he'd be able to do it before too long. The next series of photos show the assembling of the greenhouse which started on 17 February, a tricky time because due to the coronavirus, we were self isolating, Josey who did the first part and Leigh who finished the job 2 days later both came in the side gate and didn't come into the house at all.
 Here's the frame being put together, then put on the base

 and another view of the assembly
 and on the second day, here's Leigh putting the finishing touches to everything, there was a lot more fixing of clips and gluing than I expected
 What I hadn't really thought much about was what the area outside the greenhouse will be like, at the moment when it rains, it'll be very muddy, so I'm going to dig out a channel around the outside, use a layer of aggregate and lay bricks down
 This is another side to be dug out
 and this is the back of the greenhouse where there will be 2 water butts and a vegetable garden in between them
 This is the view of the front of the greenhouse , I wanted it a little way from the fence because it doesn't want to be shaded, I've now planted 2 rows of potatoes and a third row of lettuces there.
 On the first day the greenhouse was in place, there was sadly a casualty, a female blackbird flew into the glass and died. We put blue tape at the windows and hopefully the birds will get used to it.
I'm looking forward to extending the growing season quite a bit, and spending quite a bit of time in there.
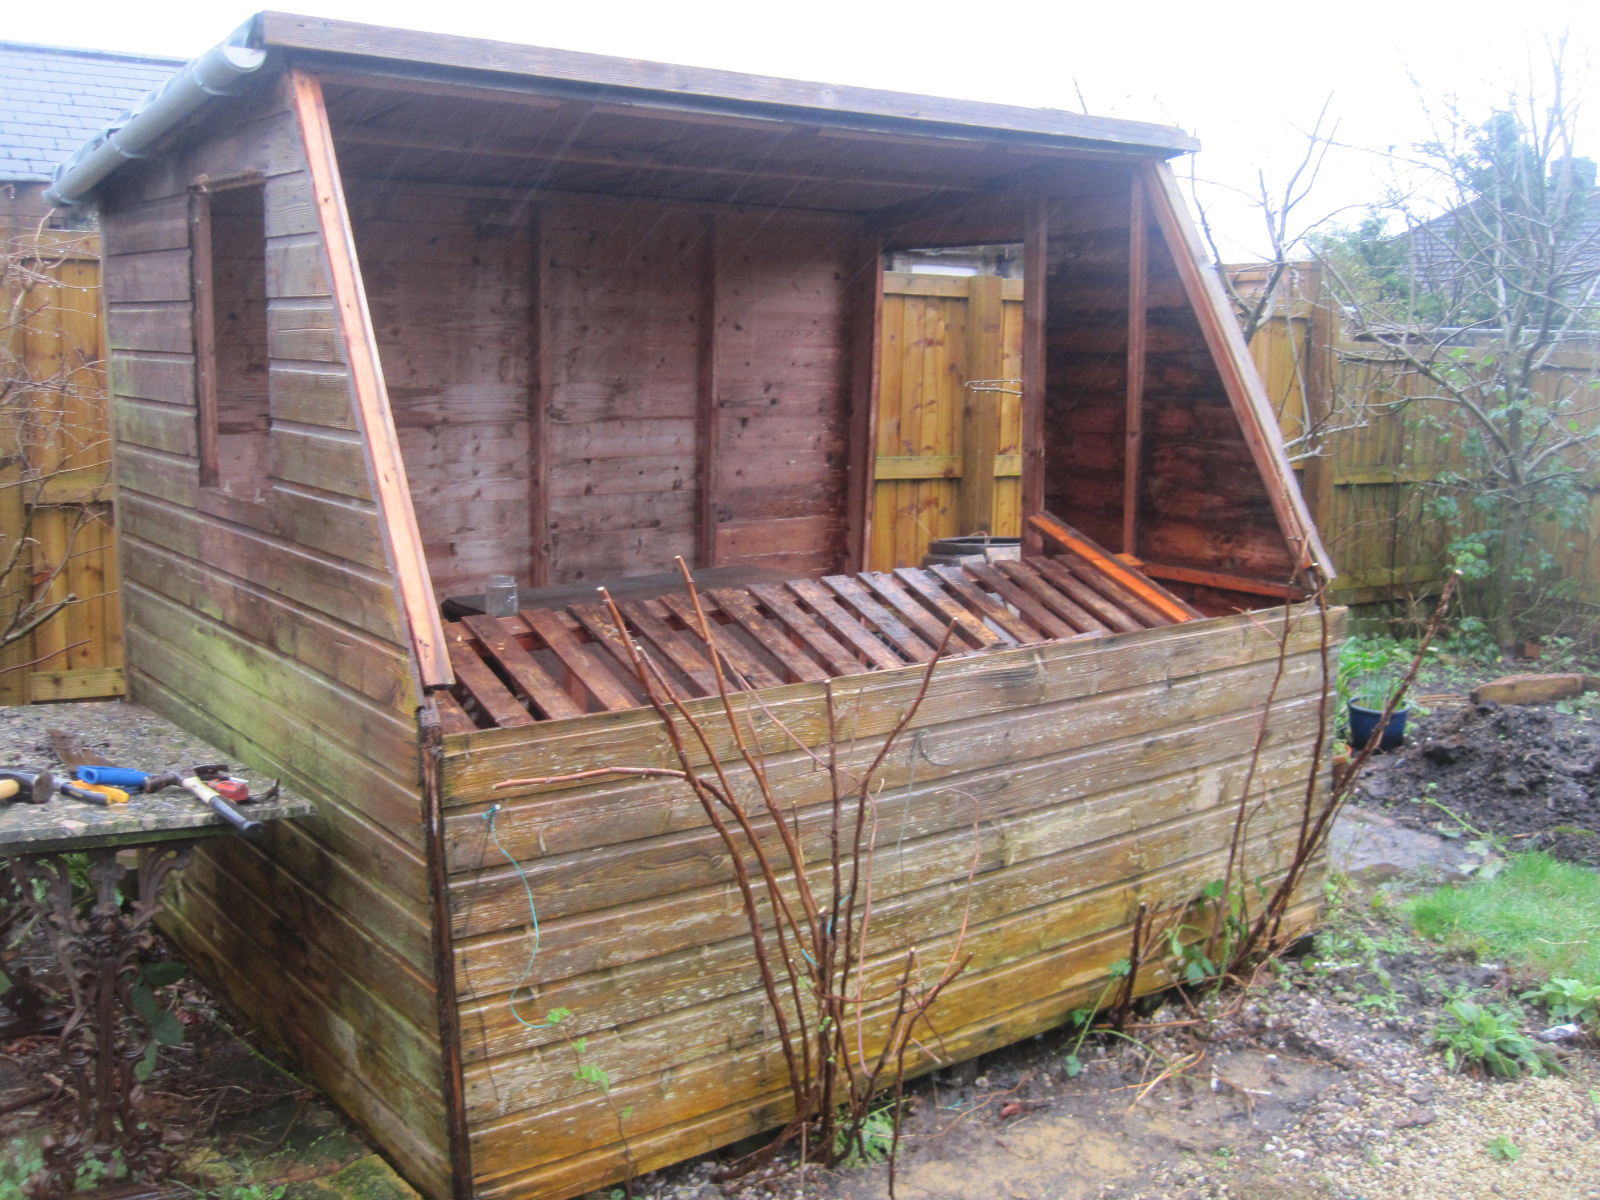
A PS to this, Tim has sent me a couple of photos of the shed before it was dismantled
 It wa svery useful for starting seeds in the spring, but the wood around the window had rotted, and the glass fell out when it was very windy.

There are many decisions to be made about what size and sort of greenhouse to have, my co father- in- law, Rick, who has three large greenhouses in his garden advised me to get the biggest you can accommodate in your garden which seemed like good advice. I looked online and found The Greenhouse People's website was reasonably easy to follow, and there was someone at the end of the phone to talk through differences between greenhouses which wasn't obvious to a beginner. I chose an 8ft x 10ft aluminium greenhouse, I quite fancied a green one, but they were about £300 more, but I did opt for the Stableford ultimate package which included self opening windows and shelving.
I took a few photos of the process from shed to greenhouse, although something I left out was the photos of the shed being removed from the site. When we had a cleared piece of ground, we measured the area, and Tim then dug out a small trench to fill with concrete where the base was going to be laid with friend Andrew who had kindly volunteered to help with the concreting and leveling of
the base. The first photo shows the shuttering round the trench and string in place where the edge of the greenhouse would stand, this stage of the process was quite difficult because it was hard to make sure the rectangle was 'square', and the rain kept coming filling the trenches with water.


I'm looking forward to extending the growing season quite a bit, and spending quite a bit of time in there.

Comments
Post a Comment